macro photography
definition
A macro photograph is one in which the
size of the subject on the negative or image sensor is life size or greater,
although most of the time we will end up looking at a large size image of a
really small insect or flower, for example.

how to achieve this
·
Most camera
manufactures sell Macro lens which allow photographers to expand the image to
greater than 1:1… these lens’ are quite expensive, alternatively learners can
use the camera in macro mode if available (this may not be as effective as a
dedicated lens).
·
Use point of
focus OR manual focus
·
Use A TRIPOD
to frame the object and background, apply compositional rules where possible.
·
Experiment
with depth of field, you will be very close to your subject which results in a
sudden drop off on focus, to overcome this you might want to maximise your
depth of field therefore shoot at f 16 f22.b In other circumstances you may
like the drop off in focus in which case use a lower f stop e.g. 4.0
·
Work with a
low/medium ISO from 100 to 400
·
Apply manual
exposure and the exposure meter to ensure that the subject is adequately
exposed.
·
In some case
you may choose to use flash light.
image bank


contact sheets


camera settings and equipment
for this shoot, i used a nikon D7100 and a macro lens. i also used a tripod and a lamp. the settings i used were an ISO of 100, anf F stop of 13 and a shutter speed of 10". as i was using a tripod, the shutter speed wasn't an issue as long as i was careful when i pressed the shutter. when i took these, the room was completely dark apart from a lamp i had kept next to the subject of my photo.
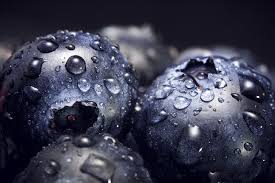
for the photos i used a boot, avocado, cat, pencils, coffee and a rose.
creating the final product
edited these photos by manipulating the brightness settings to make the shadows and highlights stand out more. i didnt edit some of the photos as they came out as clear as i was hoping for.
final product


evaluation of the end result
overall i am pleased with the result. the photos came out very clear and i enjoyed experimenting with different textures. if i were to do this shoot again, i would use a remote release so that i dont risk shaking the camera and taking a blurred image.


No comments:
Post a Comment